
Integrating our net .NET SDK in a WPF Datagrid
The StellarDS SDK for .NET, launched just last week, brings a powerful and structured way to interact with cloud-based data. Designed to simplify development and optimize API interactions, this SDK provides strong typing, an intuitive design, and seamless integration—allowing you to work with StellarDS effortlessly. As a fast and scalable Backend-as-a-Service (BaaS) solution, StellarDS.io handles storage, security, and scalability, so you can focus on building great applications without the hassle of backend complexities. Through its powerful REST API, developers can efficiently retrieve and manipulate data while ensuring smooth performance.

In this blog post, we’ll build a Customer Management Application using WPF, the StellarDS.io SDK, and OAuth2 authentication. Our app will display customers in a WPF DataGrid, allow adding/editing/deleting records, and support pagination for handling large datasets efficiently. Since StellarDS.io doesn’t handle authentication, we’ll also implement OAuth2 ourselves to secure API requests. By the end, you’ll have a fully functional WPF application that combines powerful data handling with secure authentication.

Demo
Since this demo contains a significant amount of source code, we won’t cover every single line in detail. Instead, we’ve provided the complete source code, which you can download here and is part of the Github Repository.
In this blog post, we’ll focus on the core functionality of the application—how it works and how to integrate the StellarDS .Net SDK. We’ll skip the UI design aspects and other minor details, keeping the focus on the key implementation steps.
Creating our application
To get started, open Visual Studio and create a new WPF App using .NET 9.
Once the project is created, we need to install the required dependencies. Our application interacts with StellarDS.io and requires certain libraries. Open NuGet Package Manager in Visual Studio and install the following:
1️⃣ StellarDS SDK → StellarDs.SDK
2️⃣ WebView2 → Microsoft.Web.WebView2
3️⃣ Dependency Injection → Microsoft.Extensions.DependencyInjection
These packages will allow us to interact with the StellarDS API, display web-based content (if needed), and manage dependencies efficiently.
Appsettings
To keep our API configurations flexible, we’ll store them in an appsettings.json file. This allows us to easily change settings without modifying the code.
Create an appsettings.json file in the root of the project and add the following content:
"StellarDSSettings":
{
        "ApiKey": "",
        "ClientId": "",
        "Secret": "",
        "ReturnURL": "http://localhost:3030",
        "AuthCodeURL": "https://stellards.io/oauth"

}
The ApiUrl defines the base URL for StellarDS, and the ApiKey is used for authentication when making API calls. Be sure to replace "your-api-key-here" with your actual key.
Dependency Injection
The first step in setting up our application is to enable dependency injection (DI). By using DI, we can register our SDK classes as services, making them easily accessible throughout the entire application.
To achieve this, we need to override the OnStartup method in App.xaml.cs and modify it as follows:
 protected override void OnStartup(StartupEventArgs e)
    {
        var builder = new ConfigurationBuilder()
            .SetBasePath(Directory.GetCurrentDirectory())
            .AddJsonFile("appsettings.json", false, true);

        Configuration = builder.Build();

        var serviceCollection = new ServiceCollection();
        ConfigureServices(serviceCollection);
        Encoding.RegisterProvider(CodePagesEncodingProvider.Instance);
        _serviceProvider = serviceCollection.BuildServiceProvider();
        var mainWindow = _serviceProvider.GetRequiredService<MainWindow>();
        mainWindow.Show();
    }
Next, we need to define the ConfigureServices method, where we register all required services within the ServiceCollection. This ensures that our API clients, configuration settings, and other dependencies are properly managed. You can add the method like this:
 private void ConfigureServices(ServiceCollection serviceCollection)
    {
        serviceCollection.AddTransient<MainWindow>();
        var config = new StellarDs.SDK.Client.Configuration();

        var oauthConfig = Configuration?.GetSection("StellarDSSettings").Get<OauthConfiguration>();

        if (oauthConfig == null) return;"
        config.ApiKey.Add("Authorization", oauthConfig.ApiKey);
        config.ApiKeyPrefix.Add("Authorization", "Bearer");
        var dataApi = new DataApi(config);
        var oauthApi = new OAuthApi( new StellarDs.SDK.Client.Configuration());

        serviceCollection.AddSingleton<DataApi>(dataApi);
        serviceCollection.AddSingleton<OAuthApi>(oauthApi);
        serviceCollection.AddSingleton<OauthConfiguration>(oauthConfig);

        serviceCollection.AddSingleton<RefreshTimer>();
    }
Creating our view
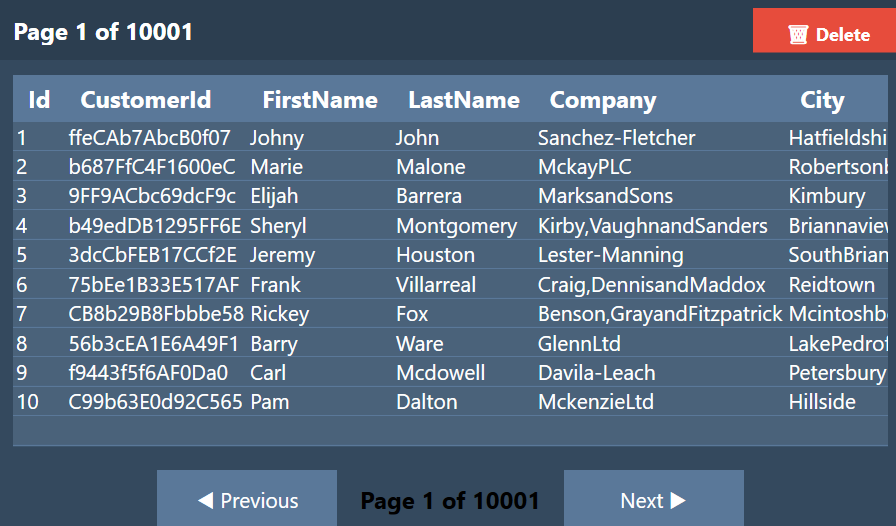
To display our list of customers, we'll use a WPF DataGrid. The DataGrid control provides an easy way to display and manage tabular data within the UI.
Open MainWindow.xaml and add the following DataGrid inside the <Grid> element:
 <DataGrid Name="DataGrid" RowEditEnding="DataGrid_OnRowEditEnding"
                  CanUserDeleteRows="True"></DataGrid>
Loading and Binding our data
Now that we've added a DataGrid to our form, the next step is to integrate the necessary services that will allow us to retrieve and manage customer data. We achieve this using dependency injection (DI), ensuring that our application remains modular and maintainable.
To do this, modify the constructor of MainWindow as follows:
public MainWindow(DataApi dataApi, RefreshTimer refreshTimer, OauthConfiguration oauthConfiguration)
    {
        _dataApi = dataApi;
        _refreshTimer = refreshTimer;
        _oauthConfiguration = oauthConfiguration;

        InitializeComponent();
    }
This ensures that our API client, token refresh handler, and OAuth configuration are available throughout the application.
Now that we have set up our dependency injection, let's take a closer look at how we retrieve data from the StellarDS API and populate our DataGrid. The following method, GetData, is responsible for fetching customer data and displaying it in the UI. Let's break it down step by step.
Create the Method to Fetch Data
To retrieve customer records from StellarDS, we need an asynchronous method that sends a request to the API. Inside MainWindow.xaml.cs, add the following method:
private async Task GetData(int take = 0, int offset = 0)
This method will be responsible for retrieving data from StellarDS. The two parameters, take and offset, allow us to control pagination:
takespecifies how many records to fetch per request.offsetdetermines where to start retrieving data (useful when loading the next page).
By making this method async, we ensure that it runs in the background without freezing the UI while waiting for the API response.
Next, inside the GetData method, we call the StellarDS API to retrieve data:
var result = await _dataApi.GetAsync(_project, Table, offset, take);
Here’s what’s happening:
_dataApiis our instance of StellarDS's API client, injected via dependency injection._projectis our StellarDS project ID, which specifies which dataset we are querying.Tableis the name of the database table where customer records are stored.offsetandtakeare used for pagination, allowing us to load only a subset of data at a time instead of retrieving everything at once.
After calling _dataApi.GetAsync(), the API returns a response containing:
- The requested data (list of customer records).
- The total count of available records.
- A success status, indicating whether the request was successful.
Before we continue processing the data, we need to verify that the API request was successful. Add this check inside GetData:
if (result is not { IsSuccess: true, Data: not null }) return;This ensures that:
- The API request succeeded (
IsSuccess: true). - The returned
Datais not null (meaning we actually received records).
If the request fails, we exit the method early to prevent errors.
The data returned by StellarDS is in JSON format, so we need to convert it into C# objects before using it in our application. Add the following:
var source = data.Select(d => d.ToObject<Customer>()).ToList();
This line:
- Loops through each JSON record in
data. - Converts it into a
Customerobject using.ToObject<Customer>(). - Stores the converted records in
source, which is a list of Customer objects.
By transforming JSON into strongly typed objects, we can work with the data more easily inside our C# code.
Bind Data to the DataGrid
Now that we have a list of Customer objects, we need to display them inside our DataGrid. Add the following line:
DataGrid.ItemsSource = source;
This assigns the source list to the DataGrid's ItemsSource property, which automatically updates the UI and displays the customer records.
Creating and editing records using the DataGrid
To support inline editing and record creation in our WPF DataGrid, we use the RowEditEnding event to send updates to StellarDS. Since modifying data inside the grid can trigger this event recursively, we first unsubscribe before handling the edit:
dataGrid.RowEditEnding -= DataGrid_OnRowEditEnding;
dataGrid.CommitEdit();
We then extract the edited record, ensuring it's a valid Customer object, and remove the
Id field before sending it to the API:if (e.EditAction != DataGridEditAction.Commit)
{
dataGrid.RowEditEnding += DataGrid_OnRowEditEnding;
return;
}At this point, we determine whether to update an existing record or create a new one. Before each API call, we refresh the access token to ensure authentication is valid.
Updating an Existing Record
If the customer already has an Id, we send a PUT request to update the record:
if (e.Row.DataContext is not Customer rep)
{
    dataGrid.RowEditEnding += DataGrid_OnRowEditEnding;
    return;
}

var request = rep.AsDictionary();
request.Remove("Id");
Creating a New Record
If the Id is null, the record is new, so we send a POST request to create it:
else
{
    _dataApi.Configuration.ApiKey["Authorization"] = await _refreshTimer.RefreshAccessToken();
    var result = await _dataApi.PostAsync(_project, Table,
        new CreateRecordRequest(new List<Dictionary<string, object>> { request }));

    if (result.IsSuccess) await GetData(10, _offset);
}
Finally, we re-subscribe to the event to ensure future edits are handled:
dataGrid.RowEditEnding += DataGrid_OnRowEditEnding;
Why Unsubscribe and Resubscribe?
This prevents recursive event calls when committing edits, ensuring API requests only happen once per edit. It also keeps the DataGrid responsive without conflicts.
Deleting Records
To allow users to delete a record, we first need to add a Delete button to the form. Open your XAML file and add the following button inside your layout:
<Button Content="Delete" Click="ButtonBase_OnClick" />
This button triggers the ButtonBase_OnClick method when clicked.
Handling the Delete Button Click
In the ButtonBase_OnClick event, we retrieve the selected record from the DataGrid and send a DELETE request to StellarDS’s API. If successful, we refresh the data to update the UI:
private async void ButtonBase_OnClick(object sender, RoutedEventArgs e)
{
    var rep = (Customer)DataGrid.SelectedItem;
    await _dataApi.DeleteAsync(Guid.Parse("5f28959b-f6cd-43f1-64eb-08dcc0e23b55"), 288, (int)rep.Id);
    await GetData(10, _offset);
}
This ensures that when a user selects a record and clicks Delete, it is removed both from StellarDS and the DataGrid.
This demo showcases how to effectively manage tables within a StellarDS project using the StellarDS .NET SDK. We've built a WPF application that allows users to view, create, update, and delete records within a table while integrating dependency injection for better structure and maintainability. The UI is built with WPF’s DataGrid, providing a familiar and efficient way to interact with data.
So far, we've set up the WPF project, integrated the StellarDS SDK, and implemented core CRUD functionality for managing records. In Part Two, we’ll take this further by implementing OAuth2 authentication, allowing users to securely authenticate and manage their sessions within the application.
Get Started Today
The StellarDS C# SDK is available now, complete with sample code and detailed documentation to help you hit the ground running. Explore our Customer management demo, dive into the SDK’s capabilities, and start building powerful applications with StellarDS today.
Download the SDK or Check out the Documentation to get started now!
Follow us now!
Show us support and follow us on our social media to always be up to date about stellards.io
|
|
|
|
|